Below is a walk through on my process for watercolor painting on iPad with Procreate and my Master Water Color Brush Set. This is just the way I work. It doesn’t mean it’s the only way. Take what you like from my process and create your own workflow that feels right for you.
Step 1
Create a new file in Procreate at least 8.5x11 at 300 dpi. I begin by importing the textured watercolor paper that came with the MWC Brushes. This texture file is seamless so you can copy and paste it as many times as you need to to fill the background.
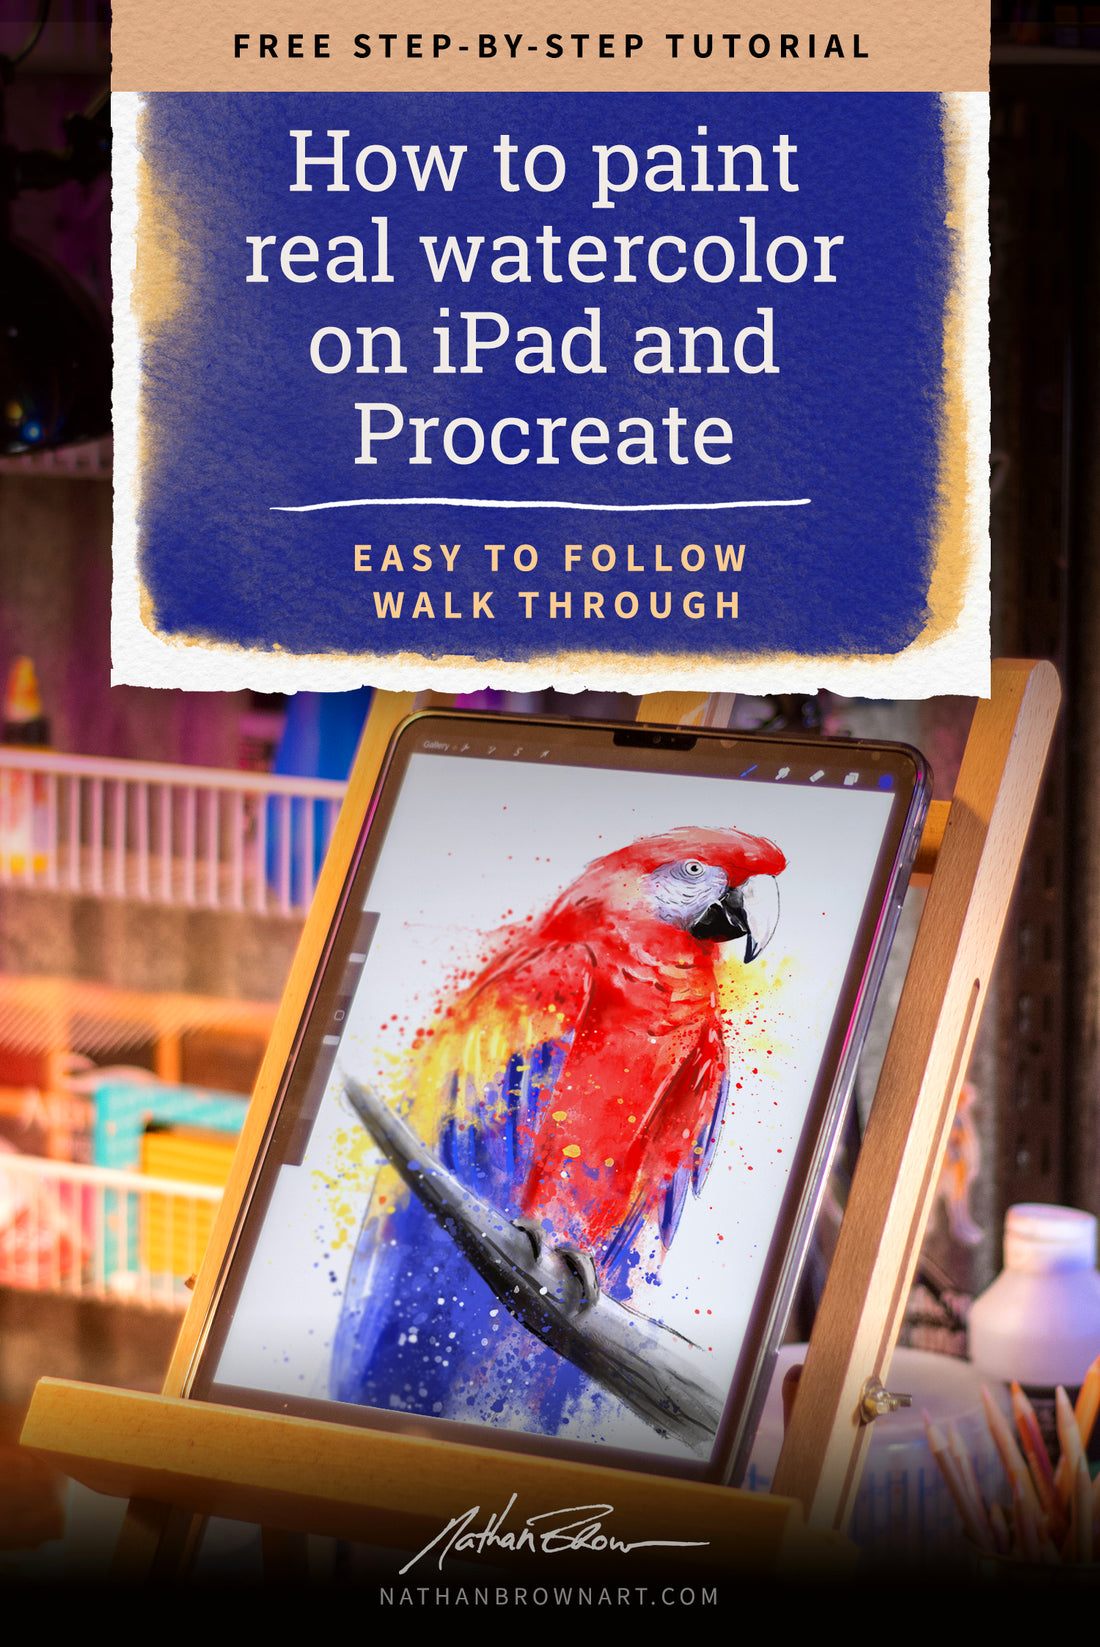
I found a great macaw photo to use as reference for a quick pencil sketch. Once I’m happy with the sketch, I’ll begin painting.
Quick Tip: The more detailed your illustration is the tighter your painting will be, or don’t draw as much to keep things loose.
Step 2
Using a Watercolor Textured Round brush, choose a bright red color, and begin to block in the main red color of the macaw.
Just like real watercolor most of the MWC Bruhes are transparent. So once you lift the pencil from the screen and start a new strock it will show any existing strokes underneath.
You can use this to your advantage and start darkening a few shadow area around the feathers and wings.
Go ahead and continue to color in other feather areas using a bright yellow and blue.

Step 3
In this step I’m going to add some detail around the macaws face and beak. I’ll do the majority of this detail work with the “Loaded” brush. This is brush is opaque, and will paint over itself without seeing anything underneath.
3a. Here I have just begun to paint in the basic shape of the eye and all of the lines in the macaw’s face with a pink and gray color. I also added just a bit of shadow on the upper beak.
3b. I used the “Loaded” brush to color in the darkest portion of the upper and lower beak. I also allowed some of this dark color to “bleed” into the other areas around the beak. To do this I used the blend tool with the “Smudge Heavy” brush.
3c. Here I’m just adding more detail with the “Loaded” brush, and some shadow areas with a “Textured Round” brush again.
3d. Finally I add some highlights around the cracks in the beak and the eye with white using the “Loaded” brush.
Quick Tip: Don’t worry about being too tight while coloring in the shapes. Remember watercolor works best when its loose and expressive.

Step 4
4a. In this step I paint in some dark areas around the feathers using the same “Loaded” brush. Refer to the reference photo if you are unsure of where shadows and highlights might fall.
4b. Then I “add water” to the paint to allow it to blend out and run. In order to do this I use the blend tool with the same “Smudge Heavy” brush.
Note: You can use any brush with the blend tool But I created the Smudge Heavy and Light brushes specifically for this task.
4c. I went ahead and repeated steps 4a and 4b for the yellow and blue feathers as well as darker red shadows areas.
Quick Tip: Remember to stay loose and don’t worry too much about fine details in areas outside the face and beak.

Step 5
Here’s where things get really fun. I like a lot of splatters and runs in my watercolor paintings. That’s why I have included so many brushes in this set for that purpose. In this step I begin to allow the painting to fall outside of my initial pencil drawing.
I know I want the bottom portion of the bird to be far less detailed than the top half. So I begin adding a series of washes using brushes from the “Washes.brushset” collection.
I stacked 3 wash brushes here, and used the blend tool again in a downward stroke to make some of the paint appear to run down the paper.
Quick Tip: It doesn’t matter which wash brushes you choose. Pick one or two that naturally fit in with the composition. Try rotating them if you need to.

Step 6
Before I get carried away with washes and splatters (as I usually do). I need to add some detail around the feet and branch that the macaw is sitting on. I need to do this now while I can still see the pencil drawing.
The trick here is to not get too detailed. I don’t want as much detail as the face because it’s not the main focal point of the painting.
I use another Textured Round Brush to paint in some low lights and then highlights, along with the Fine Liner Brush for some harder lines.
Quick Tip: Remember to stay loose. Don’t add too much detail in an area that is not the primary focus of the painting.

Step 7
More washes! In this step I added a few more washes in the same red and yellow as the other feathers. In an actual watercolor painting this may be areas where you allow the paint to run and spread outside the initial drawing. It doesn’t matter which wash brushes you use, where you place them or how many you use. Have fun and experiment with placement, etc...
7a. My first pass I place on a layer below everything else in the painting.
7b. The second pass of washes I place on a layer above the main painting layer.
Once I’m happy I usually combine layers so that areas can be blended together where needed.

Step 8
Add some splatters! This is another step where you can absolutely go nuts (like I do), or you can be more reserved and give it a light touch. The point is it’s up to you. I add splatters of all kinds using various brushes from the Splatters.brushset and the Drips.brushset.
I add them in front and behind until everything looks balanced, in my opinion. Again... Use your own discretion.
Note: The splatter and drips brushes vary in the way they create splatters. Some are simple stamps, and some require strokes to spread drips. Experiment with these brushes to become familiar with how they work.

Step 9
Now it’s time to take a look at the painting as a whole and make some decision. Ask yourself questions like:
- Is there enough detail where there should be?
- Is there enough contrast? Highlights? Shadows?
- Are the enough splatters? (just kidding)
In order to complete the painting you need to decide in this stage if you’ve hit a nice balance between detail and abstract. After all watercolor can be really great at both.
9a. I felt like there wasn’t enough detail around the macaw’s face. So with a variety of Script, Rounds and Loaded brushes I brought out some of the lights and darks and overall texture.
9b. I also wanted to bring out some contrast in the shadows. So I chose a darker red and painted a few hard shadows around the red feathers.
9c. Same goes for the highlights. I used a white color and round brush to add some bright highlight details.

Conclusion
So that is basically the same process I use on just about any watercolor painting, whether it’s on paper or on the iPad. I believe you can apply and modify these same techniques in your own work and with any subject matter. I hope you found this tutorial useful and I hope it helps get you started with using The Master Watercolor Brush Set for Procreate. You can purchase the brush set here. Thanks for reading!